How to Remove Acrylic Nails at Home Without Damaging Your Nails
There’s a moment when a lifted acrylic edge catches on a sweater, and the decision feels urgent: pull it, or do this properly. That choice often determines whether your natural nails survive the encounter, and the safest route — from the classic acetone soak to the no-acetone alternatives — depends on what’s actually happening to your nail plate while you work.
Standard removal solvent: 100% acetone ·
Typical soak time: 20–30 minutes ·
Natural nail regrowth: about 6 months ·
Main acrylic risk: damage from prying or over-filing
Quick snapshot
- Acetone dissolves acrylic resin; prying can strip natural nail (Healthline (health resource))
- Acetone is flammable and must be kept away from heat (National Library of Medicine (medical research))
- Filing the topcoat helps acetone reach the acrylic (Good Housekeeping (beauty editors))
- Exact loosening time varies by acrylic brand, thickness, and application method (Marie Claire (beauty editors))
- Soak time guidance ranges from about 10 to 30 minutes depending on product thickness and filing (Healthline (health resource)) (Marie Claire (beauty editors))
- Some editorial protocols recommend testing softening at 20 minutes; others wait longer (Marie Claire (beauty editors)) (Marie Claire (beauty editors))
- Soak time ranges 10–30 minutes depending on filing (Healthline (health resource))
- Natural nail regrowth takes about 6 months (Healthline (health resource))
- Recovery from over-filing requires weeks without enhancement (Healthline (health resource))
- Moisturize and use cuticle oil after removal (Allure (beauty publication))
- Wait a few weeks before applying a new set (Healthline (health resource)) (Allure (beauty publication))
- See a professional if removal hurts or nails feel thin (Healthline (health resource)) (Allure (beauty publication))
Five facts worth knowing before you pick up a file: acetone is the only household chemical that reliably dissolves cured acrylic, soaking typically takes 20–30 minutes, prying is the fastest route to a damaged nail bed, and regrowth after serious damage takes months, not days.
| Key fact | What you should know |
|---|---|
| Most reliable remover | Acetone |
| Soak time | 20–30 minutes with 100% acetone |
| Natural nail regrowth | About 6 months |
| Pain warning | Stop removal if you feel sharp pain |
| Aftercare step | Use cuticle oil and moisturizer after removal |
| Acetone flammability | Keep away from flames, sparks, and heat sources |
| Acetone exposure | Can enter the body through inhalation or skin contact |
| Topcoat treatment | Buffing it off helps acetone reach the acrylic bond |
How do I remove acrylic nails myself at home?
The at-home removal process breaks down into four steps: prepare your tools, file the topcoat, soak with acetone, and gently push off the softened product. Each step has a specific purpose, and skipping the preparation is where most damage starts.
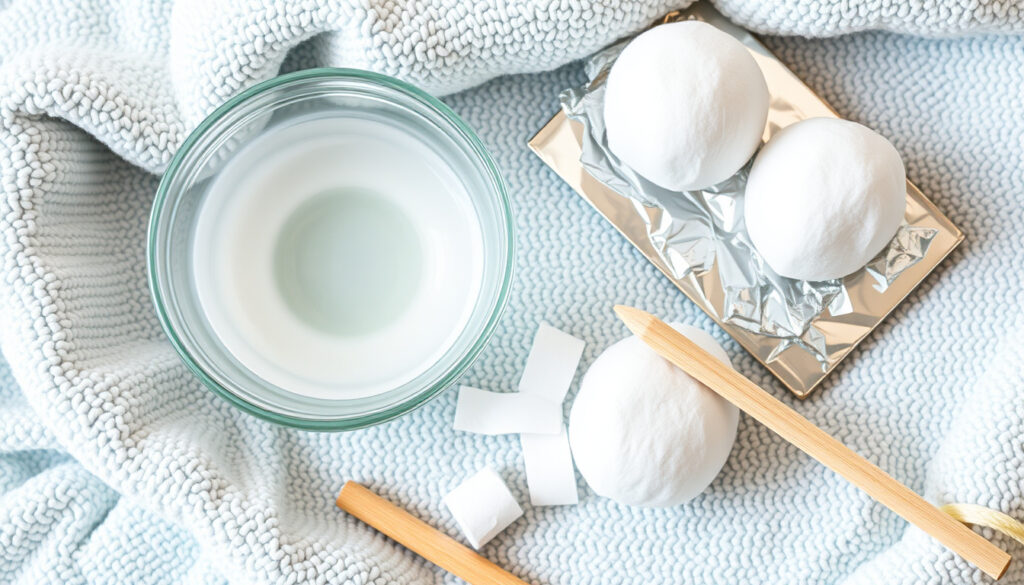
Tools to prepare before starting
- 100% acetone
- Cotton balls or pads
- Aluminum foil cut into squares
- A 100-grit or coarser nail file
- A cuticle pusher or wooden stick
- Petroleum jelly and cuticle oil
Petroleum jelly around the nail folds helps protect surrounding skin from acetone exposure, according to Healthline (health resource). Clip excess extension length before soaking while avoiding cutting into the natural nail, as recommended by Marie Claire (beauty editors).
Step-by-step acetone soak
- Clip the length. Use nail clippers to shorten the acrylic extension, leaving a small margin above the natural nail.
- Buff the topcoat. Lightly file the shiny surface until it looks dull. This helps acetone penetrate more effectively, notes Good Housekeeping (beauty editors).
- Apply petroleum jelly. Coat the skin around each nail to limit acetone contact.
- Soak the cotton. Saturate cotton balls with 100% acetone and place one on each nail.
- Wrap with foil. Wrap each fingertip tightly, sealing the cotton against the acrylic.
- Wait 20–30 minutes. Let the acetone break down the acrylic resin.
- Test one nail. Remove the foil and check if the acrylic has softened. If it hasn’t, re-wrap and soak longer.
The cotton-and-foil method places acetone-soaked cotton directly over each nail and limits contact with surrounding skin, according to Allure (beauty publication). If acrylic resists gentle removal, the recommended response is additional soaking rather than increased force, reports Marie Claire (beauty editors).
Safe lifting and filing technique
Once the acrylic has softened, use a wooden stick or cuticle pusher to gently lift the product away from the nail plate. Forceful scraping can damage the nail plate, warns Marie Claire (beauty editors). Work from the cuticle toward the free edge, and stop if you feel resistance or sharp pain.
The acrylic that resists your gentle push isn’t ready yet. Re-wrap it in acetone-soaked cotton and wait five more minutes instead of prying it off.
Troubleshooting when acrylics are stuck
If a nail resists after a full soak, the acrylic layer was likely thicker than average or the topcoat wasn’t filed enough. Reapply the acetone-soaked cotton and foil, wait another 10 minutes, and test again. Prying or pulling off acrylics can separate the natural nail from the nail bed — that’s the injury that leads to bruising, pain, and sometimes infection, as noted by Healthline (health resource).
The implication: the “stuck” moments are signals, not obstacles. They mean the acetone hasn’t finished its job, not that you need more force.
Can acetone remove acrylic nails?
Yes, but only if you understand what it’s doing. Acetone dissolves the acrylic resin used in sculpted nails, breaking the polymer bond that holds the enhancement to the natural nail. Pure acetone is more appropriate for this than ordinary remover diluted with other ingredients, according to Healthline (health resource).
What acetone does to acrylic polymers
Acrylic nails are made from a polymer powder and liquid monomer that cure into a hard plastic. Acetone works by breaking the chemical bonds in that cured resin, softening it until it can be gently pushed away. This is why soaking works and prying doesn’t: prying attacks the natural nail, while acetone targets the acrylic itself.
100% acetone vs regular nail polish remover
The important difference is what each formula can actually break down.
| Product | How it works on acrylic | Best use case |
|---|---|---|
| 100% acetone | Dissolves cured acrylic resin | Full acrylic removal |
| Non-acetone remover | Struggles to break acrylic bonds | Regular polish changes only |
| Diluted acetone blends | Works but requires longer soaking | When pure acetone isn’t available |
Nail technicians usually use an acetone soak for 20–30 minutes, with the exact time depending on how much product was filed away, notes Healthline (health resource).
How long acetone takes to break the seal
Some editorial protocols recommend approximately 20 minutes of foil-wrapped soaking before testing whether acrylic has softened, according to Marie Claire (beauty editors). Individual soaking guidance ranges from about 10 to 30 minutes, depending on acrylic thickness and how much product was filed away, adds Healthline (health resource).
Skin safety and ventilation when using acetone
Acetone is highly flammable and must be kept away from flames, sparks, heat sources, and smoking, warns the National Library of Medicine (medical research). Acetone should not be microwaved or heated directly because of its flammability, notes Cosmopolitan (beauty editors). The work area should be well ventilated because acetone vapors can irritate the respiratory system, advises Good Housekeeping (beauty editors). Acetone can enter the body through inhalation, ingestion, or skin contact, although severe effects are generally associated with substantial exposure, according to the same research.
What this means: acetone is effective but not casual. Treat it like a solvent, not a beauty product, and the safety rules become straightforward.
How to remove nail extensions at home without acetone?
No-acetone removal is possible but slower and riskier. The methods fall into three categories: manual buffing, low-speed electric filing, and household soaks that soften the surrounding skin without dissolving the acrylic itself.
Buffing and filing off extensions manually
Mechanical filing can remove acrylic but risks thinning the natural nail. A 100-grit or coarse file is commonly recommended for reducing the acrylic surface before soaking, according to Marie Claire (beauty editors). Work slowly and check your progress frequently, because once the acrylic is gone, the same file will gladly remove your natural nail plate.
Hot water and oil soak method
Warm water and oil can soften cuticles but do not dissolve cured acrylic, according to Healthline (health resource). These soaks may loosen a nail that’s already lifting, but they won’t break the acrylic bond. If you’re hoping for a single household product that works like acetone, it doesn’t exist.
Every minute you spend filing instead of soaking is a minute the file is also touching your natural nail. Acetone targets the acrylic; a file doesn’t know the difference.
Using a nail drill at low speed
Nail drills should be used with light pressure and low speed, and a coarse electric nail drill bit is typically used only to break the top seal before acetone, per the technique described by licensed nail technicians. At home, without training, the risk of over-filing and creating divots in the natural nail increases significantly. If you don’t own a drill and have no experience with one, this isn’t the moment to learn.
When to stop and go to a salon
If removal hurts, stop and seek professional help, advises Healthline (health resource). A salon removal uses an e-file plus acetone and is performed by a nail technician who can see the difference between acrylic and natural nail — a distinction that’s hard for a home user to make.
What household items can take off acrylic nails?
Acetone is the household product most likely to dissolve acrylics, and it’s available at any drugstore. Other household items — dish soap, oil, warm water, dental floss — either soften surrounding tissue or create mechanical stress, but they don’t break the acrylic polymer bond.
Acetone as a household drugstore product
Despite the “household” framing, acetone is a legitimate chemical solvent with two safety warnings attached: it’s flammable and it dries skin. The National Library of Medicine (medical research) confirms acetone can enter the body through inhalation, ingestion, or skin contact, so brief, ventilated, targeted use is the goal.
Dish soap, oil, and warm water soak
A bowl of warm water with dish soap and oil can soften cuticles and may loosen lifted edges, but it does not break down acrylic polymer, notes Healthline (health resource). Use this method only if no acetone is available, and understand that it may take far longer than a soak with pure acetone.
Dental floss and other prying hacks
Dental floss, thread, or any other tool slid under an acrylic to “saw” it off is a prying method in disguise. Prying with household tools can strip layers of the natural nail, warns Healthline (health resource). The separation happens between the nail layers, not cleanly between acrylic and nail.
Signs that a DIY method is damaging the nail
- Sharp pain during removal
- Thinning or flexing of the natural nail
- Ridges or divots after the acrylic is gone
- Redness or tenderness in the nail bed
- White spots or peeling on the nail surface
If the nail bed is tender, avoid household hacks and see a professional, advises Healthline (health resource). Tenderness is the first sign of separation between the nail plate and the nail bed beneath it.
Do acrylic nails ruin your natural nails?
Acrylics are not inherently damaging, but rough removal can be, according to Healthline (health resource). The nail damage associated with acrylics — thinning, ridges, peeling, yellowing — usually comes from over-filing, prying, or wearing the same set too long, not from the acrylic itself.
Damage caused by improper removal
Prying or ripping off acrylics can strip layers of the natural nail plate, leaving it thin, weak, and painful. The safest general approach is to dissolve acrylic with acetone rather than pry, pull, bite, or rip it off, advises Marie Claire (beauty editors).
Signs of nail damage after acrylics
- Thinning that makes the nail feel flexible
- Ridges or dents in the nail plate
- Peeling or flaking at the free edge
- Yellowing or discoloration
- Sensitivity or pain when tapping the nail
Can damaged nails recover?
Natural nails can regrow, but it takes months. The nail matrix produces new nail plate from the cuticle area, and a full regrowth cycle takes about 6 months, notes Healthline (health resource). A few weeks without enhancement improves nail bed recovery, allowing the skin beneath the nail to reattach and heal.
Preventing damage before the next set
Give your nails at least a few weeks between sets if you notice any thinning or tenderness. Moisturize daily with cuticle oil and hand cream, and consider skipping enhancements entirely until the natural nail feels firm again.
Why this matters: the question isn’t whether acrylics ruin nails — it’s whether removal gives the natural nail a chance. The damage happens in the last five minutes of a removal, not in the weeks the set is worn.
Acetone soak vs. salon removal: which is right for you?
Three removal methods, one decision: how much risk are you willing to manage at home? The comparison below weighs time, cost, and safety.
| Method | Time needed | Cost | Risk level | Best for |
|---|---|---|---|---|
| Cotton-and-foil acetone soak | 20–30 minutes plus prep | Low (acetone + cotton + foil) | Low with careful technique | Home removal with intact nails |
| Bowl acetone soak | 20–30 minutes | Low | Higher skin exposure to acetone | Quick removal when foil isn’t available |
| DIY filing or drill | 15–45 minutes | Low to moderate | High for over-filing | Experienced users only |
| Salon removal | 30–60 minutes | Moderate to high | Low when done properly | Damaged nails, first-timers, thick acrylics |
Upsides
- Acetone is cheap and available at any drugstore
- Cotton-and-foil method limits skin exposure
- Home removal saves the cost of a salon visit
- Acetone dissolves acrylic without mechanical damage
Downsides
- Acetone is flammable and dries the skin
- Soaking takes 20–30 minutes of waiting
- Over-filing at home can thin the natural nail
- Prying mistakes can separate nail from nail bed
The cost gap is real, but the risk gap matters more: salon removal is the safer answer when your nails are already fragile.
Should you try the no-acetone route?
The no-acetone methods exist because acetone has downsides: it’s harsh on skin, requires ventilation, and carries flammability risks. But the alternative — filing — replaces a chemical risk with a mechanical one that directly endangers the natural nail plate.
The pattern for choosing: if your nails feel thick and healthy, the acetone soak is the right starting point. If your nails already feel thin, sore, or peely, skip home removal entirely and book a salon appointment where an e-file and trained technician can work close to the natural nail without risking it.
Confirmed facts and open questions
After reviewing the research, the line between established fact and uncertainty is useful for deciding how carefully to approach each step.
Confirmed facts
- Acetone dissolves the acrylic resin used in nail extensions (Healthline (health resource))
- Prying or pulling acrylics can strip the natural nail plate (Marie Claire (beauty editors))
- Natural nails regrow from the matrix in about six months (Healthline (health resource))
- Warm water and oil do not effectively dissolve cured acrylic (Healthline (health resource))
- Acetone is flammable and requires ventilation (National Library of Medicine (medical research))
- A bowl-soak method exposes more skin to acetone than cotton-and-foil (Good Housekeeping (beauty editors))
What’s unclear
- Exact loosening time varies by acrylic brand, thickness, and application method (Marie Claire (beauty editors))
- Soak time guidance ranges from about 10 to 30 minutes depending on product thickness and filing (Healthline (health resource))
- Some editorial protocols recommend checking softening at 20 minutes; others wait longer (Marie Claire (beauty editors))
- Whether repeated acrylic applications permanently alter nail thickness is not fully established
- Some household hacks may loosen lifted edges but have no reliable evidence of full removal
- The point at which at-home filing crosses into over-filing isn’t defined by a numerical threshold
The gaps are reason to stay conservative: where evidence runs out, the safest method is the one with the least mechanical force.
What the pros say about safe removal
“The safest general approach is to dissolve acrylic with acetone rather than pry, pull, bite, or rip it off.”
— Board-certified dermatologist, on why acetone soaks are preferred over mechanical force (Marie Claire (beauty editors))
“A coarse electric nail drill bit is only used to break the top seal before acetone — never to grind all the way down to the natural nail.”
— Licensed nail technician, on why e-file use is about pre-treatment, not full removal
“Torn cuticles or exposed nail beds can allow bacteria and yeast in after removal.”
— Infection-control professional, on why aftercare is part of safe removal
Those three professional perspectives converge on one instruction: solvent first, force only after it stops being necessary.
The final step: aftercare counts as removal
Removal doesn’t end when the last acrylic piece comes off. The natural nail has been soaking in a solvent that strips oils, and the nail bed may have been temporarily stressed by the weight of the enhancement. Wash your hands, apply cuticle oil to the nail folds, and moisturize the entire hand.
For anyone who just removed acrylics at home, the choice is clear: treat the next few weeks as recovery time. Moisturize daily, skip the next enhancement until the nail feels firm, and stop at the first sign of pain or tenderness — or the damage from a rushed removal will outlast the months of wear you got from the acrylics.
Frequently asked questions
What is acetone nail polish remover?
Acetone is a colorless solvent that dissolves nail polish and acrylic resins. It’s the active ingredient in most professional-grade removers and is more effective than non-acetone formulas for breaking down acrylic polymers, notes Healthline (health resource).
Can I use regular nail polish remover instead of acetone?
Regular non-acetone remover can take off nail polish but struggles with cured acrylic. Pure acetone is more appropriate for dissolving acrylic than ordinary remover diluted with other ingredients, according to Healthline (health resource).
Is it okay to drill off acrylic nails at home?
Nail drills should be used with light pressure and low speed, and in professional practice they’re used to break the top seal before acetone, not to grind the entire acrylic away. At home, without training, the risk of over-filing and damaging the natural nail is high. If removal hurts, stop and seek professional help.
What should I do if my natural nails feel sore after removal?
Soreness after removal can indicate the acrylic was pried or the natural nail was over-filed. Stop any further filing, wash the nails gently, apply cuticle oil, and give the nails a break from enhancements. If pain is sharp or persistent, or signs of infection appear, consult a healthcare provider.
How soon can I get a new set after removing acrylics?
Wait a few weeks if your nails feel thin, flexible, or tender. Full natural nail regrowth takes about 6 months, and a break from enhancements in the weeks following removal allows the nail bed to recover, notes Healthline (health resource).
Should I oil my nails every day after acrylic removal?
Yes. Acetone strips natural oils, so daily cuticle oil and hand moisturizer help restore moisture to the nail folds and surrounding skin. Petroleum jelly around the nail folds before removal also helps protect skin from acetone exposure, according to Healthline (health resource).
How do I know if my nail is infected after acrylic removal?
Signs of infection include redness, swelling, pus, green or yellow discoloration, increasing pain, or a nail that separates further from the nail bed. Torn cuticles or exposed nail beds can allow bacteria and yeast in after removal, so monitor the area closely and see a healthcare provider if any of these signs appear.
The at-home remover has one reliable resource: acetone. The safe method is chemical, not mechanical — and the moment pain starts, the salon becomes the right option.
More related posts
 Trucks for Sale Ireland: DoneDeal, Autoline & More
 How Old Is Martin Kemp? Age and Biography
 Conor McGregor Wedding Reason: Why He Married in Vatican
 Who Owns Adare Manor? JP McManus, Billionaire Owner
 Member First Credit Union: North Dublin Loans & Branches
 How to Delete an Instagram Account Permanently: Full Guide
 Cast of Ginny and Georgia: Actors and Characters Guide
 Club L London Returns: Policy, Costs, and Process